Coffee
How to Make Cold Brew with an AeroPress Instantly
Aug
Cold brew coffee has become a beloved choice for coffee aficionados, offering a smooth and refreshing flavor profile. If you’re a coffee enthusiast, you’re probably always on the lookout for new and exciting ways to enjoy your favorite brew. One method that has gained popularity in recent years is making cold brew coffee using an AeroPress. This unique approach combines the convenience of the AeroPress with the smooth and refreshing flavors of cold brew. In this article, we’ll guide you through the process of making cold brew with an AeroPress, step by step.
What is Cold Brew Coffee?
Cold brew coffee is a brewing method where coffee grounds are steeped in cold or room-temperature water for an extended period, usually around 12 to 24 hours. This slow extraction process results in a smoother, less acidic, and highly concentrated coffee that can be diluted to preference.
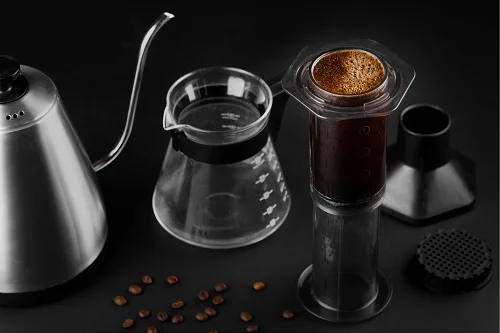
Why Use an AeroPress for Cold Brew?
The AeroPress, known for its versatility and quick brewing time, might seem an unlikely candidate for cold brew. However, it offers a unique way to create a concentrated cold brew that’s ready to be diluted with water, milk, or your choice of liquid. The pressure-based extraction of the AeroPress results in a flavorful and aromatic cold brew that stands out from other methods.
What You’ll Need
Before you dive into making cold brew with an AeroPress, gather the following:
- AeroPress
- AeroPress filter
- Coarse coffee grounds
- Cold or room-temperature water
- Stirring utensil
- Dilution liquid (water, milk, etc.)
- Optional: Sweeteners or flavorings
Step-by-Step Guide
Step 1: Assemble Your AeroPress
Arrange your AeroPress, filter, coffee grounds, and water. Having everything within reach streamlines the process.
Step 2: Choose the Right Coffee
Opt for high-quality, coarsely ground coffee beans. Their freshness and grind consistency contribute to a robust flavor.
Step 3: Add Coffee to AeroPress
Place the AeroPress on a sturdy mug, insert a filter into the cap, and add the coffee grounds. Start with two AeroPress scoops for a strong flavor.
Step 4: Rapid Brewing Technique
Pour cold water over the coffee grounds until the AeroPress chamber is full. Stir the mixture briskly for 10 seconds to ensure even saturation.
Step 5: Press and Serve
Attach the plunger to the AeroPress and gently press down. The pressure-driven extraction will yield a concentrated cold brew. Dilute the concentrate with water or milk if desired, and enjoy your instant AeroPress cold brew.
Customizing Your Instant Cold Brew
Experiment with coffee-to-water ratios, grind sizes, and dilution levels to tailor your cold brew exactly to your taste preferences.
Cleaning and Maintenance
After enjoying your instant cold brew, disassemble the AeroPress and rinse all components. Regular cleaning ensures optimal performance and longevity.
Conclusion
Making cold brew with an AeroPress opens up a world of possibilities for coffee lovers seeking a refreshing and flavorful twist on their favorite drink. By following these simple steps and experimenting with different ratios, you can craft your own perfect AeroPress cold brew.
FAQs
1. Is instant AeroPress cold brew weaker than traditional cold brew?
Yes, but its speed and convenience make up for the difference in strength.
2. Can I use flavored coffee grounds for this method?
Absolutely, flavored grounds can add an extra layer of complexity to your brew.
3. How does the flavor compare to traditional cold brew?
Instant AeroPress cold brew offers a slightly different profile, but it retains the smoothness and low acidity.
4. Can I make a larger batch using this method?
While the AeroPress is designed for single servings, you can repeat the process for multiple cups.
5. Can I use hot water for instant AeroPress cold brew?
It’s not recommended, as the cold water extraction method contributes to the unique flavor of cold brew.